Today’s meeting was about carving and it was introduced with the question: What experience do members have with carving? A few have done some surface embellishments or done some texturing with Dremel tools or wire brushes. Most had carved Thanksgiving turkeys. One member had carved small duck decoys. One member mentioned that carving is difficult for left-handed people since most tools revolve the wrong way for them.
Two of our members have extensive carving experience and are mentors for our club. They presented examples and information to help inspire others who may want to add carving to their future skills.
Dan Hall
Dan uses Danish oil on his projects since he’s found that wipe-on poly doesn’t get absorbed into the burned areas. Another member had been successful with coats of spray poly.

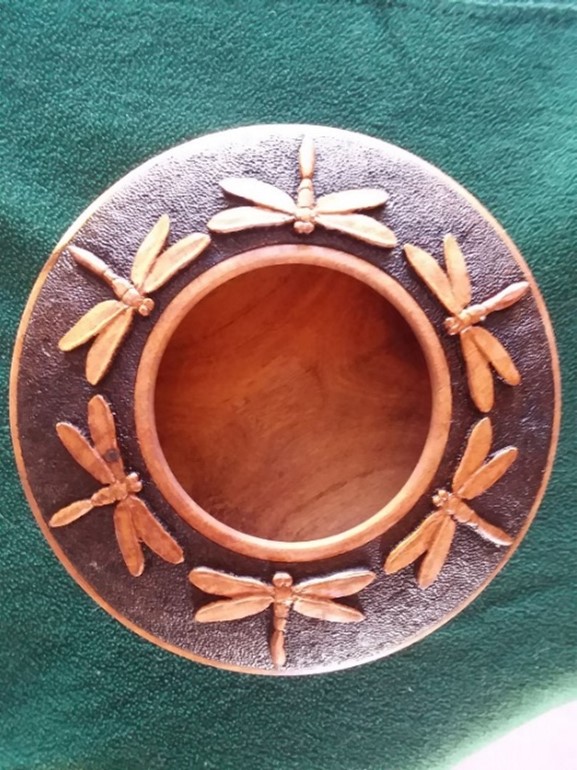
This bowl made of mesquite has 6 dragonflies carved along the slightly sloped top. Dan made a drawing of the dragonflies to figure out how many would fit and made the bowl to fit that size. He used the circumference to look at the spacing that seemed correct and used the indexer on the lathe to line up the tails and heads. He wanted the dragonflies to be the highest point and made the rims lower by turning them down. In this case, he hollowed it first but learned that it’s easier to hollow after carving since it’s easier to control turning than cutting with the router.
He removed the background with a small DeWalt router and a 1/8th inch bit. He started in the middle between the dragonflies then used his power carver to get closer to the edges and make the angles of the wings. Carving was easier than burning the background texture afterwards with a woodburning tool, a tedious process achieved in half hour intervals, but he likes the result.
In this case, Dan left the raised rims on the edges of this mesquite bowl. He carved the lizards first before hollowing it and left the wood thick in that area. It’s undercut when hollowing to the midpoint of the lizards.
He drew his pattern and measured it with some space between the lizards. He had one lizard pattern but flipped it over so the tails and angles differed for variety. Dan cut out his pattern and traced around it but made the toes by free hand. He recommended that, if using tracing paper, only graphite rather than carbon paper be used since the carbon interferes with the woodburning process. He used a power carver to work in small places. He sanded the bowl before removing it from the lathe, left the woodburning section rough and slightly sanded the lizards with some tiny sanding disks.
Members suggested that it would be helpful to see the sequence of steps from turning to carving to embellishing with woodburning as a series of photos. Dan said he’ll try to do that on a future project.
Dick Kelly

It helps to have a few hand carving tools to add texture to projects after doing some power carving.
Treeline (https://treelineusa.com/) in Provo, which is owned by Craft Supply is a source for woodcarving tools. Rockler and Packard also carry some tools.


Dick uses these power carvers instead of a Dremel. There are many types on the market and some are reversible or reciprocating for right- or left-handed carvers.

After discussing tools, Dick shared several carved projects.

Dick was a carver who learned from Chris Pye at the Center for Furniture Craftsmanship before he became a turner. This is his carving bench in Maine showing his hand carving tools and a project held on a rotating vise. He has a mallet used with larger gouges and some midsized hand tools. He uses a brush to keep things clean.
At this point in his carving ‘retirement career’ he uses both hand and power tools and showed some of both in his presentation.
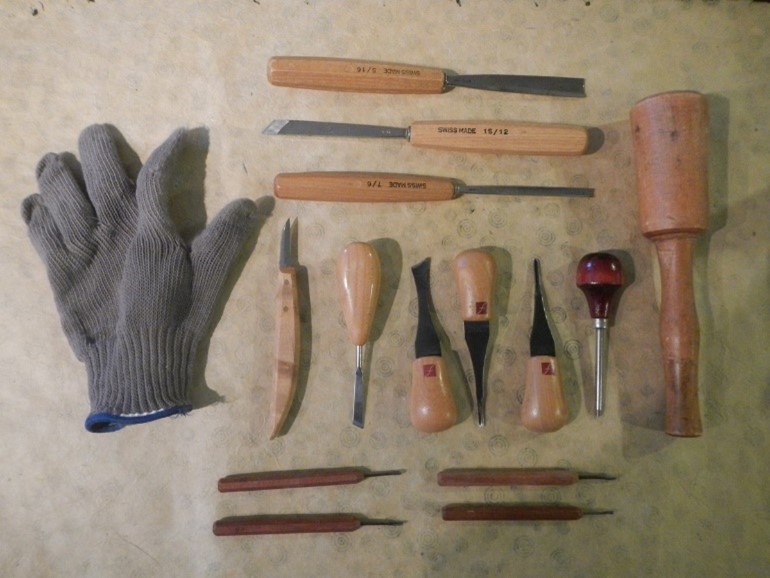
The design to be made in a piece helps decide what tools to collect. These are Dick’s hand carving tools. Across the top are his Swiss made Pfiel tools (https://www.woodcraft.com/categories/pfeil) that he uses with the mallet. These are high quality tools that can be put into service with little shaping or sharpening and don’t require frequent resharpening. They come in a variety of curvatures and widths.
In the middle are his FlexCut palm carvers which are made to use from the palm of the hand. On the left is a whittling knife and a skew; on the right is a red handled eye punch (see sunflower platter below).
On the bottom are his Dockyard fine detail tools. He uses the Kevlar glove to protect his fingers.
Another source is Woodcarvers Supply (https://www.woodcarverssupply.com/) which has its own alternative to the Swiss tools. If you order a catalog, you can see the vast potential of tools available.
These are Dick’s sharpening stones. When a carver first buys tools, they have to ‘commission carvers’ initially and then just touch them up occasionally with the sharpening stones. The top is a white Arkansas oil stone that is very fine. He uses it to rub the heel of a tool. The center is a homemade honing block made from an old leather purse glued to a block of wood with the ‘hairy’ side of the leather facing up. He used a honing compound (the white piece) to rub on the leather. It’s similar to Beall’s white diamond. He uses this with his palm gouges. The bottom is a Chris Pye set of honing stones made by Norton. The white one is similar to the Arkansas oil stone above while the black one is courser with curved edges on the four sides graduated to fit the radiuses of the curves of the gouges.
Wood rasps are used to smooth out areas when carving. They are used for shaping, not finishing and are about the equivalent of using 180 grit sandpaper. Metal files don’t work the same as wood rasps. The top ones are rifflers, used for smoothing out an area. In the center are Auriou rasps. The sizes of teeth are dependent on the size of the rasp. The bottom rasp shows the curved blade. The curvature helps with shaping an area. The rasp surface is on the bottom of the wide blade and the offset handle keeps his knuckles above the work surface.
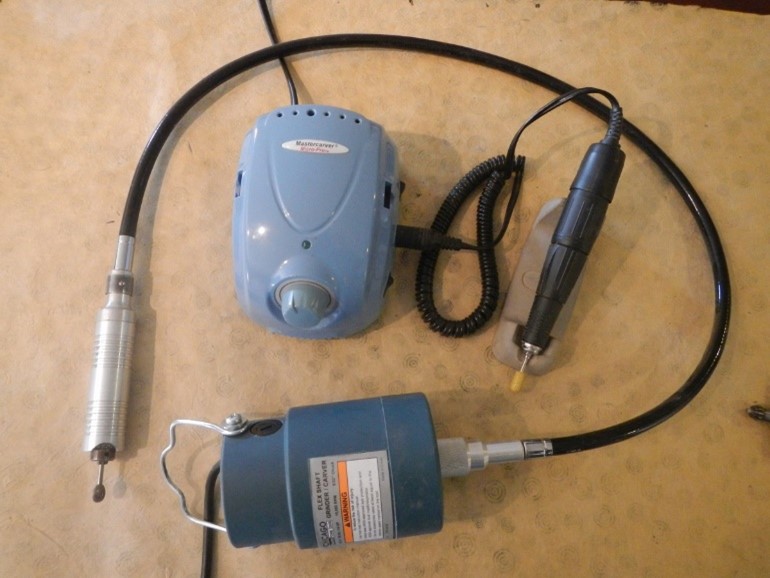
These are two examples of power carvers. The top Master Carver (~$220) has a speed control on the unit, runs at about 4000 rpm with low torque and is good for lighter, detailed cuts. In this case, it has a yellow carbide bit in it. The handle twists to change out the burrs and a collet allows two sizes of burr shafts to be used. Dixie Biggs demonstrates a Master Carver in her YouTube videos (https://www.youtube.com/watch?v=ucge2PtkrK4). The bottom Flex Shaft power carver from Harbor Freight (~$60) runs at about 1600 rpm and has a lot of torque. It’s used to hog out a lot of material. This has a key on the shaft to change out the burrs. For either, a carver needs to buy burrs in various shapes suitable for a project.
Dick uses a Bosch palm router for cutting some areas of his carvings. He put a round base plate on the bottom to use on slightly dished platters so he doesn’t get stuck in corners. A router can be dangerous to keep in control. It takes several small passes and sneaking up on an area to make the final design. In the beginning, it’s helpful to practice with a mentor on making small cuts on practice pieces. It’s important to observe safety practices to keep dust out of the eyes, as well as hearing protection since it’s noisy and lung protection. It’s difficult to see the bit to know where the router is cutting. You have to bend and have the light adjusted just right to see. Dan said he has a DeWalt router and made a clear base to see better and it has a light on it. Either Dick or Dan can be contacted as mentors to learn about using a router for carving. Check with them before investing in one.
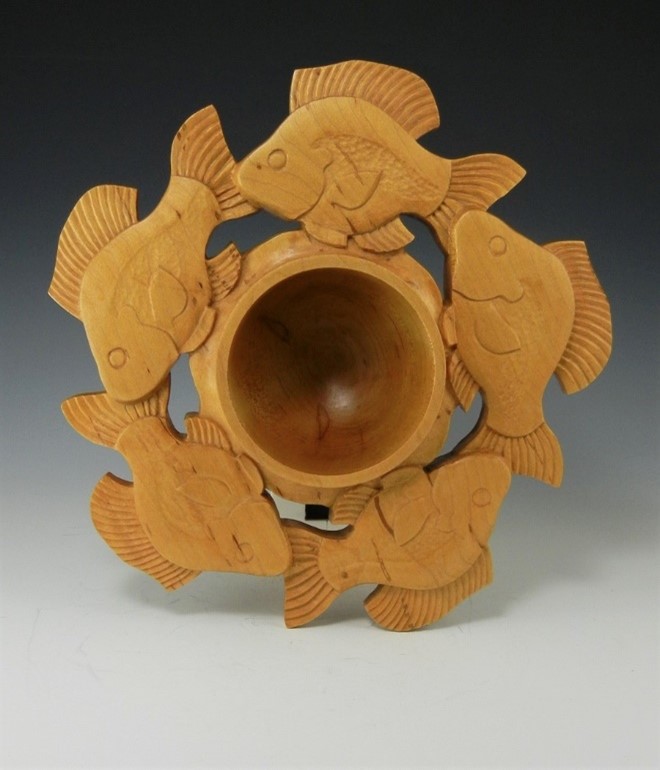
These are the first projects Dick had carved. The cup was an experiment to see if he could carve on that shape before he learned woodturning. He used a Forstner bit and palm gouges to make it. He made the platter as a decorated turning piece at Yavapai College. It’s flat across the top and he used hand carving gouges to make the vertical and curved cuts. Fish are easier to carve since they are a nice torpedo shape (without any limbs).
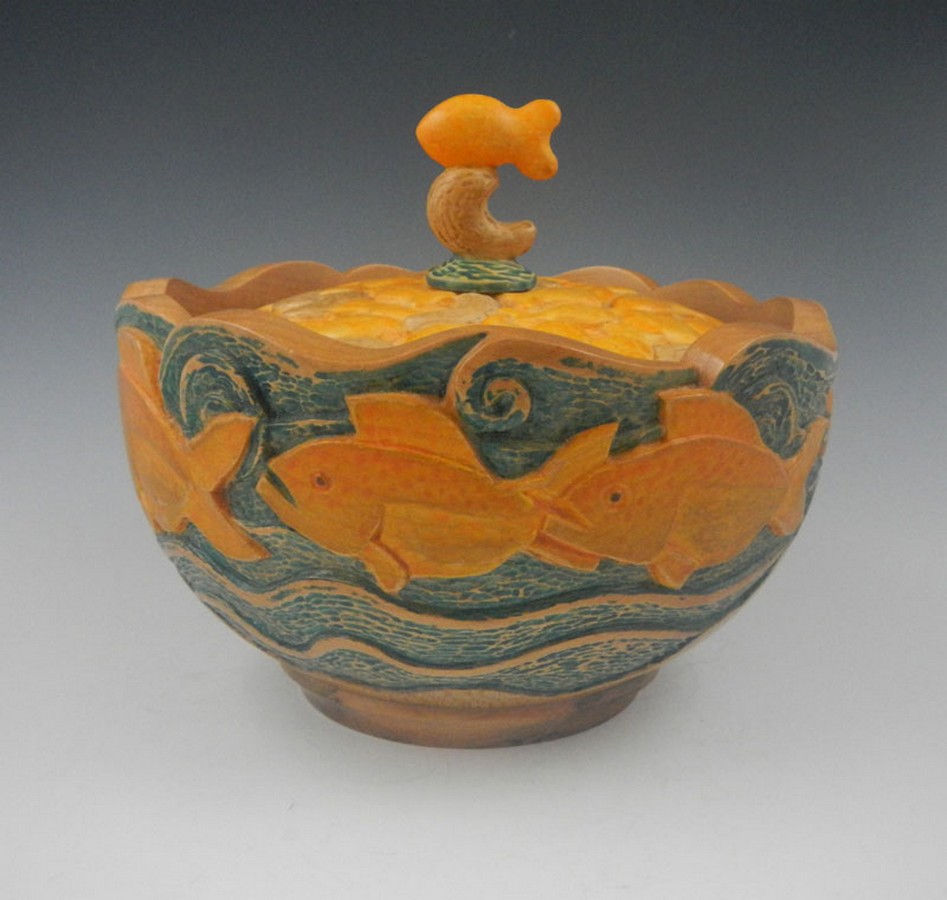
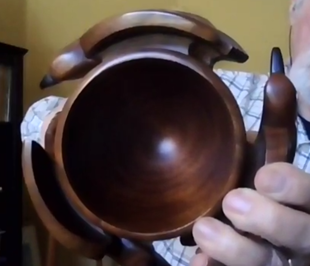
This bowl evolved over time. First the bowl was turned and carved. Then the fish were painted to be goldfish. Consequently, that inspired a lid to be made with carvings of goldfish snacks and cashews (both favorites) on the lid and as the finial. See lid photo below.
This sunfish bowl with a rim was a learning project in dealing with voids or empty spaces when turning and carving. It also works with 3-dimensional objects in a turning project. A bandsaw was used to establish the fish silhouettes around the outside of the rim. He carved the fish with palm gouges and used rasps to smooth the tops of the fish.
These views show the areas cut by the bandsaw between the heads and tails of the birds and make it easier to see which areas are turned.

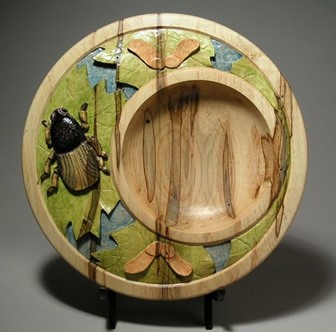
This ambrosia maple platter with an offset bowl gives more room for carving along the rim. To follow the theme, Dick carved maple leaves and ‘helicopter’ seeds as well as the ambrosia beetle that causes the features in the tree.
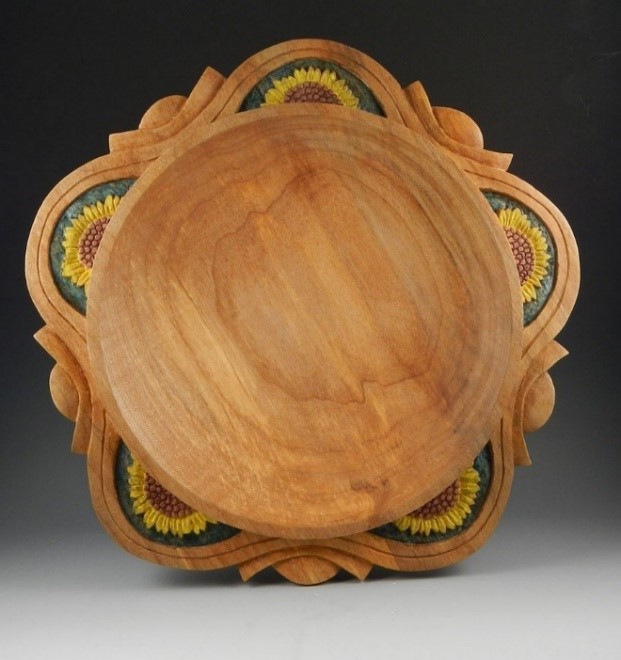
This is a functional platter with an 8” center. By making it from a 12” round, two inches of carving are allowed around the outside. A bandsaw was used to cut the outside shape before the sunflowers were carved and painted. The red handled punch (see tools above) was used for the seeds.
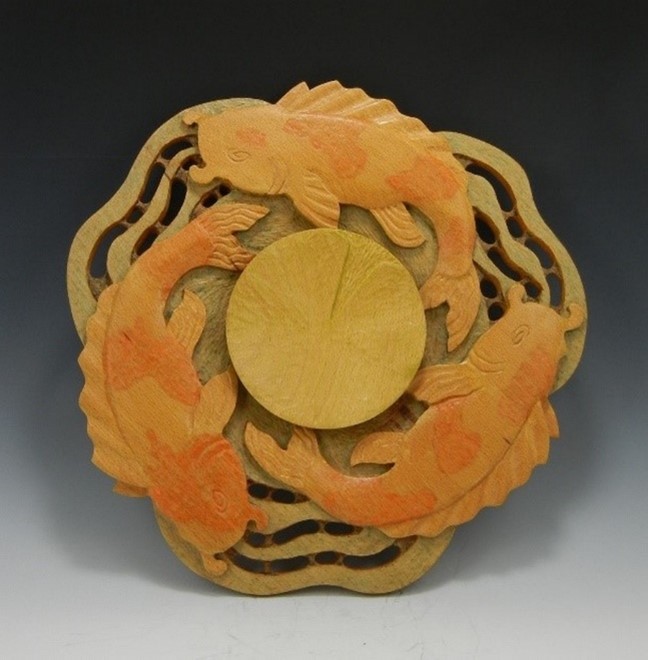
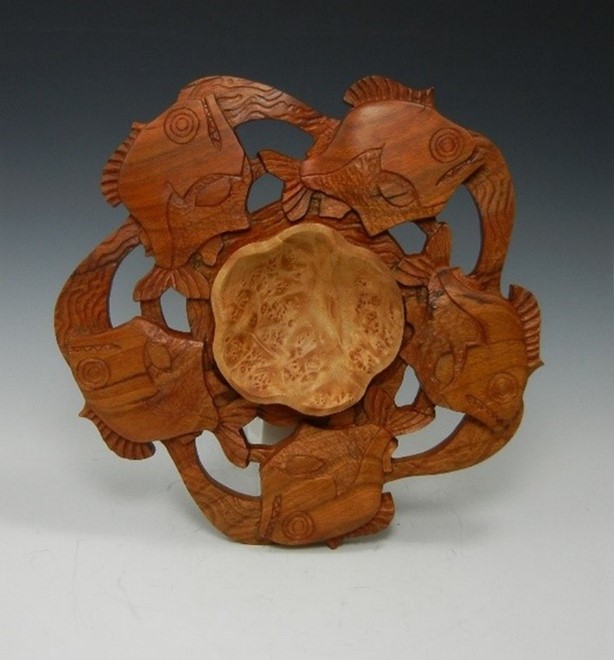
This chips and dip platter has a separate piece in the center for the dip. A router was used to make the open areas which are open in the back of the piece. The koi were made with a lot of shaping from wood rasps.
When making these pieces, Dick puts a mortise for an expansion chuck on the bottom of the bowl and on the top so the piece can be remounted for turning after the holes have been cut with a router. The top is later covered by the small bowl.
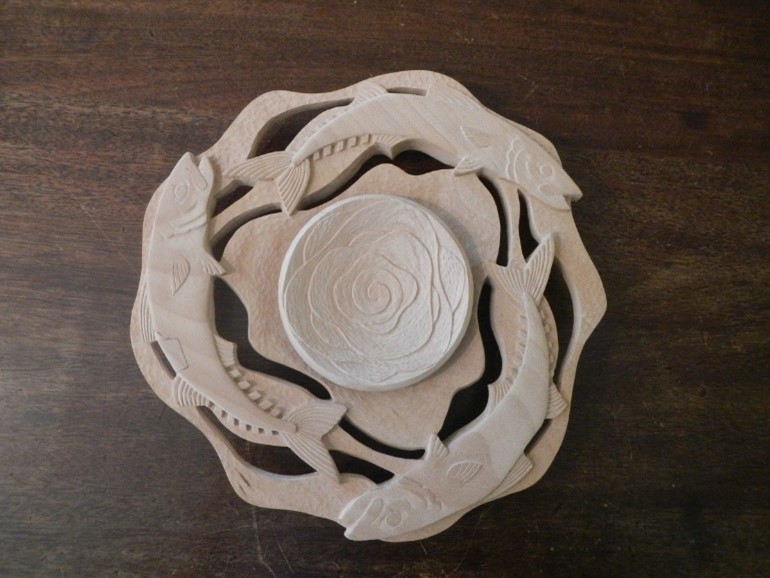
This chip and dip platter is also a work in progress. The outside rim is only attached to the inner island by the six tips of fish fins. There is a lot of air in this piece. He used his Dockyard fine detail tools on the mackerel.
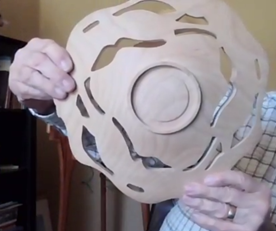
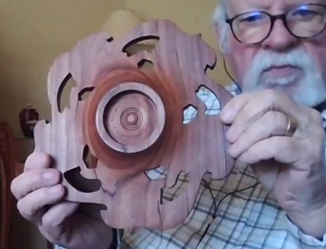
View of the bottom showing the mortise and cut out patterns from the router.
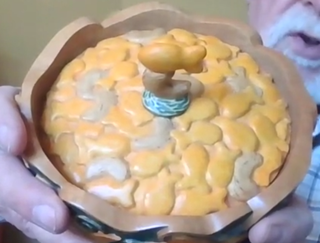
Goldfish and cashew lid

This view shows the turned parts of the bowl above and below the sunfish rim.
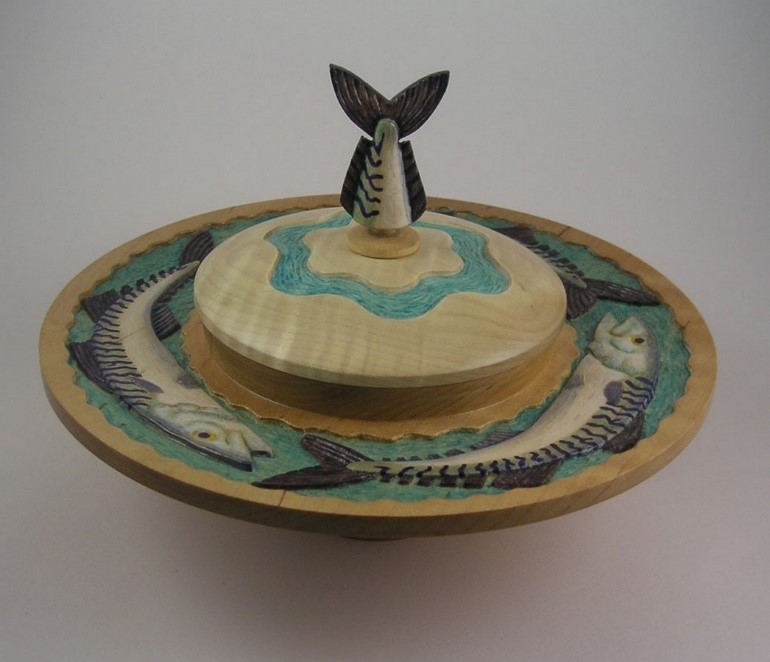
This lidded bowl uses figured wood for the lid. The finial reminded Dick of a Frank Lloyd Wright steeple so he called it a Frank Lloyd Wright mackerel bowl. The fish were hand carved with palm gouges and he used acrylic paints to add color to the piece.

This was made for a footed bowl competition in which the bowl had to rest on three feet, or in this case, wings. It’s all one piece of wood except for the African blackwood beaks. The bowl is an inside cylinder while the birds make an outside cylinder. The bottom of the bowl is a few inches up from the wing edges. A bandsaw with an 1/8” blade was used to cut the area between the bowl and birds. Riffler rasps were used on the wings.
(See next photos.)
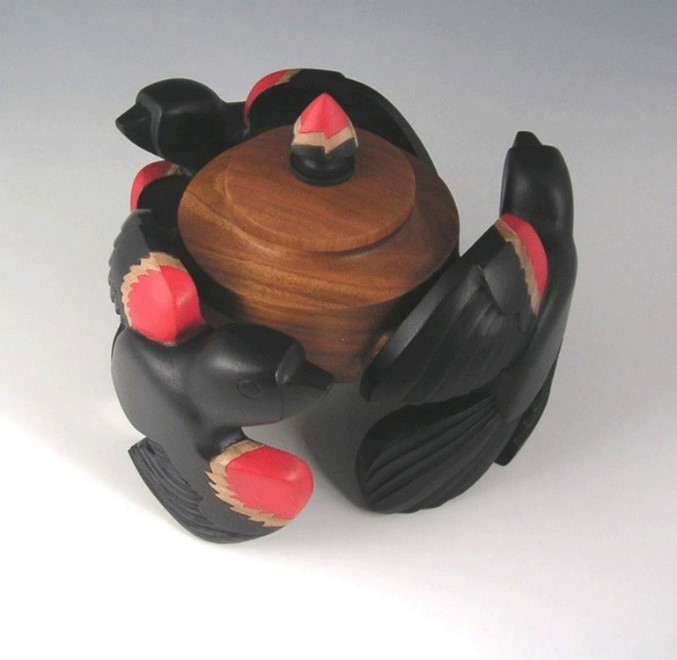
This is an example of a bowl using two concentric cylinders with blackbirds painted with acrylics. This one touches the table in six places, with wings and tails.
This view shows the raised elements of the beetle and lip of the bowl. The base is off center in the same location as the bowl on top. (AAW has an article by Keith Gotschall called “Off-Center Exercise” that shows that technique.)

This platter was turned to be flat across the surface. A router was used to cut two levels, the interior islands and the top level of the lizards. The center bowl was added later. It was painted with acrylic paints including a metallic gold.
This deep-sea hatchet fish platter was turned before the outer shape was cut with a bandsaw. A router was used to cut through the holes that go to the back (see photo below). After the holes were cut, the fish were carved with a ball burr on a power carver and then features were hand carved. The bowl was added later.
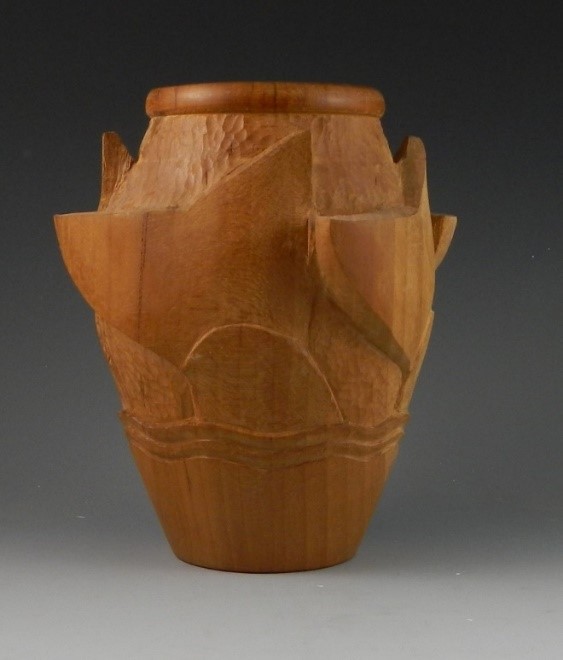
This is a work in progress that shows how the lathe is used for part of the project before carving is used on the vessel for the fish tails and textures.

Top of the piece showing the mortise for the expansion chuck for mounting on a lathe.
Members learned a lot about carving from both Dan and Dick in this extensive presentation.
Carving is a time-consuming art form. Someone likened it to segmenting, though. The time is spent carving rather than cutting and gluing many pieces together.
Laying out a design takes careful engineering. A turning plan should be sequenced on paper to help think through the steps for turning, cutting, routing and carving. A layout should be drawn in a circle with the 360°divisions of a repeated design.
Either Dan or Dick is willing to be a mentor to help anyone who wants to learn. Learning to carve is a process that should be learned as a hands-on session with a mentor. Safety is an important consideration that should be learned in that process. Discussions give us ideas; practice helps us learn.