Today’s topic concerned the different ways members finish their projects. Finish recipes vary from simple to complicated recipes and may be applied using different techniques.
Bill Lieske
Paul Vietti’s Friction Turning Finish: 1 part white varnish, 1 part linseed oil, 1 part denatured alcoholPaul was a former member of PAW who shared his recipe with Bill and other members when they used to meet in Ed Jones’ shop. Bill has used this successfully with the regular yellowish varnish since he’s never used the white varnish. He did say that white varnish can be found on Amazon or through Home Depot or Lowes, but it’s more expensive. It is a friction finish and is applied while the project is spinning on the lathe. Other members said that Shine Juice is a similar recipe except that it uses shellac instead of varnish. Mylands uses wax instead of linseed oil. The food safe quality of finishes was discussed. AAW articles have stated that finishes manufactured in the US since the 1970s are food safe once they are cured. One way to check is to do the ‘sniff test’; if you can’t smell the finish, it’s cured. The ‘Sniff Test’ to tell if a finish is cured and therefore food safe is discussed in the following AAW article: “Food-Safe Finishes”, by Bob Flexner, American Woodturner Journal, Spring 2008, pages 36-39. The reference on the AAW website is: AW2301p36-39.pdf. The article is also included in the AAW book Getting Started in Woodturning, AAW, 2014, page 151. Some members said to allow about two weeks for finishes to cure. Temperature affects the curing time, making it much slower in the winter time here and faster year-round in Phoenix. M&Ms in a wooden bowl just don’t taste the same if the bowl finish hasn’t cured yet. Interesting facts were given about the food safe quality of shellac which is a natural organic material from insects. This quote from the internet gave more details: “The hard, shiny shells on candies are often made from shellac, a resin secreted by the lac bug. You may know shellac from its more famous work in varnishes and sealants, but it’s also a mainstay in pill coatings, candy, coffee beans, and even the waxy sheen on apples and other fruits and vegetables.” Members said that carnauba wax is also used as candy coatings.Dick Kelly
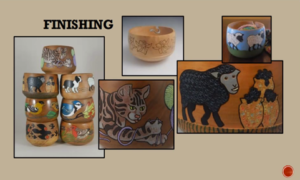 Dick enjoys adding images to wood such as the examples of the yarn bowls in his photo. He’s been told that he makes his own coloring book on wood and then paints them with artist’s brushes. He uses woodburning tools to make the lines that provide an edge to contain the paint.
The bowl in the top center was unfinished. Over time, the oils from the skin give oil to the wood and the lanolin in the wool will oil the inside.
The sheep bowl was painted with casein milk paint. Dick was concerned about the white in the sheep changing colors when sealed with a finish, so he used CrystaLac, a professional waterborne finish, premium brushable satin, that doesn’t alter colors. He said it is expensive but helps on some projects.
(Dick sent me this information about the casein paints after Chips and Grits:
There was a question about the durability of milk paint on a utilitarian object. I mentioned a Minnesota bowl maker, Jim Sannerud, who uses milk paint finishes. I expect the milk paint will be worn off over time with use. The wear is part of the charm of the medium, and it’s non-toxic, so there’s no harm. I found a nice, eight-minute-long video of Sannerud making his bowls, from tree to finished piece. He has an interesting take on not having to do twice-turned bowls, as well as the Scandinavian influence on his designs.
This is the link to his video.
https://www.pbs.org/video/Jim-Sannerud-623224H-1/ )
Generally, Dick uses acrylics to paint his designs (see the lower examples in his photo) and chooses from several products to apply a finish over the design depending on the shine he wants for the final product. He uses Liquitex acrylic color basics, a set of 48 colors, in 22 ml tubes for his painting. (about $40 from Amazon) He usually brushes Minwax clear satin wipe-on polyurethane over the painted drawings and uses Watco Danish oil on the rest of the wood on the outside of the bowl. He leaves bare wood inside which will be treated over time by the lanolin in the wool.
A few other products Dick has used are Terra Nova NaturOil, which is a FDA approved food safe, 100% kosher product. He also uses Briwax, which is made from beeswax and carnauba wax.
Since several products are expensive, he suggested using Bloxygen to keep the products from oxidizing. Bloxygen is an aerosol argon gas that’s heavier than air. It’s squirted into the top of the container for about 2 seconds and the lid is quickly placed on the container. Argon gas is so lightweight the container feels empty when it’s received from Woodcraft or Amazon. It is empty when you don’t feel a flow when spraying some out.
StopLoss Bags, available from Amazon, are another way to keep finish from oxidizing. They are pleated at the bottom so the plastic bags stand up. Pour the finish into the small opening with an expensive Harbor Freight funnel or perhaps a turkey baster, squeeze the bottom to push the air out and then seal it. Jay Loden has stored General finishes and Watco teak oil successfully in these bags.
Jim Winge makes plates and then his wife paints birds on them with acrylic paints. He said that he finishes the plates with a coat of shellac before she paints them. He then applies wipe-on polyurethane over the final project. For many of his projects, like the bowls he makes, he uses a coat of shellac, 1-2 coats of polyurethane and then buffs them with carnauba wax.
Dick enjoys adding images to wood such as the examples of the yarn bowls in his photo. He’s been told that he makes his own coloring book on wood and then paints them with artist’s brushes. He uses woodburning tools to make the lines that provide an edge to contain the paint.
The bowl in the top center was unfinished. Over time, the oils from the skin give oil to the wood and the lanolin in the wool will oil the inside.
The sheep bowl was painted with casein milk paint. Dick was concerned about the white in the sheep changing colors when sealed with a finish, so he used CrystaLac, a professional waterborne finish, premium brushable satin, that doesn’t alter colors. He said it is expensive but helps on some projects.
(Dick sent me this information about the casein paints after Chips and Grits:
There was a question about the durability of milk paint on a utilitarian object. I mentioned a Minnesota bowl maker, Jim Sannerud, who uses milk paint finishes. I expect the milk paint will be worn off over time with use. The wear is part of the charm of the medium, and it’s non-toxic, so there’s no harm. I found a nice, eight-minute-long video of Sannerud making his bowls, from tree to finished piece. He has an interesting take on not having to do twice-turned bowls, as well as the Scandinavian influence on his designs.
This is the link to his video.
https://www.pbs.org/video/Jim-Sannerud-623224H-1/ )
Generally, Dick uses acrylics to paint his designs (see the lower examples in his photo) and chooses from several products to apply a finish over the design depending on the shine he wants for the final product. He uses Liquitex acrylic color basics, a set of 48 colors, in 22 ml tubes for his painting. (about $40 from Amazon) He usually brushes Minwax clear satin wipe-on polyurethane over the painted drawings and uses Watco Danish oil on the rest of the wood on the outside of the bowl. He leaves bare wood inside which will be treated over time by the lanolin in the wool.
A few other products Dick has used are Terra Nova NaturOil, which is a FDA approved food safe, 100% kosher product. He also uses Briwax, which is made from beeswax and carnauba wax.
Since several products are expensive, he suggested using Bloxygen to keep the products from oxidizing. Bloxygen is an aerosol argon gas that’s heavier than air. It’s squirted into the top of the container for about 2 seconds and the lid is quickly placed on the container. Argon gas is so lightweight the container feels empty when it’s received from Woodcraft or Amazon. It is empty when you don’t feel a flow when spraying some out.
StopLoss Bags, available from Amazon, are another way to keep finish from oxidizing. They are pleated at the bottom so the plastic bags stand up. Pour the finish into the small opening with an expensive Harbor Freight funnel or perhaps a turkey baster, squeeze the bottom to push the air out and then seal it. Jay Loden has stored General finishes and Watco teak oil successfully in these bags.
Jim Winge makes plates and then his wife paints birds on them with acrylic paints. He said that he finishes the plates with a coat of shellac before she paints them. He then applies wipe-on polyurethane over the final project. For many of his projects, like the bowls he makes, he uses a coat of shellac, 1-2 coats of polyurethane and then buffs them with carnauba wax.Ken Allen
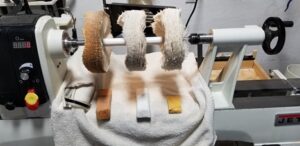
Ken has used the Beall Buffing System successfully for several years and likes the final results of buffing his objects. He’s used it on projects finished with polyurethane, Danish oil and lacquer.
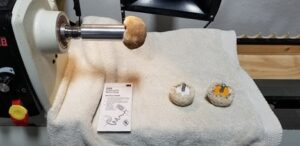
The 3 cloth buffing wheels (first picture) are used on the outside of bowls and other objects. The buffing balls (second picture) are used on the inside of bowls. Both use Tripoli polishing compound (the red material) for the first stage, White Diamond polishing compound (the white material) for the second stage, and Carnauba wax for the final stage. Both the wheel shaft and the buffing ball holder have a Morris taper on the left end for attaching in the headstock spindle. The wheel shaft is also supported by the tailstock. The adaptor, shown in the second photo, fits on the Morris taper. An extension could be added for taller objects like vases.
A thick folded towel is placed on the lathe bed to cushion any damage if an item slips out of my hands when buffing (it has happened!).
The buffing wheels are turned at 1800 rpm and generate static electricity while buffing. To avoid unpleasant shocks, which can be a surprise that causes you to jerk and possibly drop the object, Ken connects a static charge wrist strap between the lathe and his body to bleed off the charge. The strap is shown on the left in the first photo and the package is shown in the other photo. He uses painter’s tape to attach the copper end of the strap to bare metal on the lathe, such as on the lathe bed to the left and below the motor. To prevent the strap from possibly getting wrapped into the rotating parts, he tapes the other end of the strap to bare skin on his left leg near his ankle. This allows some movement while buffing without breaking the connection. This bleeds off all of the static charge and prevents the static shocks. Caution: do not tape the strap to your wrist for use at the lathe because it could get wrapped up on the rotating parts and cause an injury.
This system is quick and easy to set up and use and gives good results. Be sure to let the finish cure sufficiently before buffing. Also, use a light touch to avoid overheating the finish, which can cause some finishes to run, and avoid overly polishing through the finish to bare wood.
The older buffing balls are color coordinated, but new replacements will need to be labeled with markers since they all have white backing.
One member suggested storing them in 8X10 aluminum tins from a thrift shop with one for each polishing compound to keep from cross contaminating the substances.
Jerry Walters
Jerry enjoys making projects out of figured wood and has developed an extensive list of sanding and finishing tips. He shared a few of his beautiful, finished projects. Many of his tips will be listed and discussed after these photos.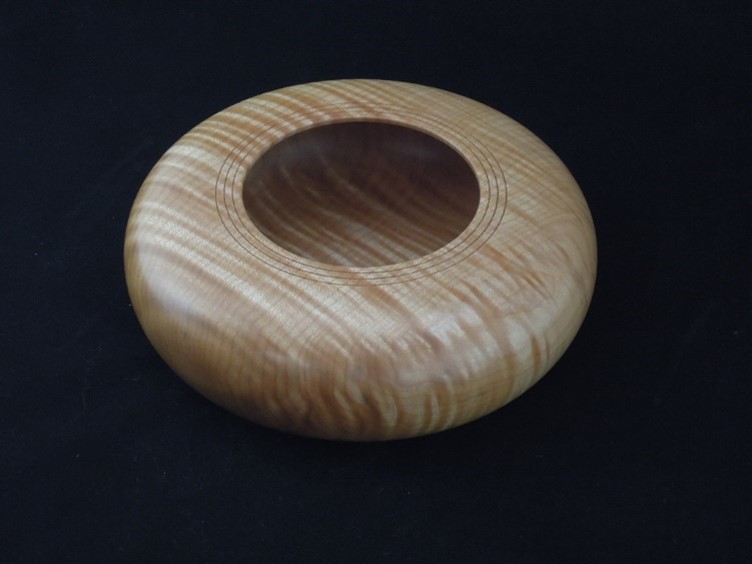
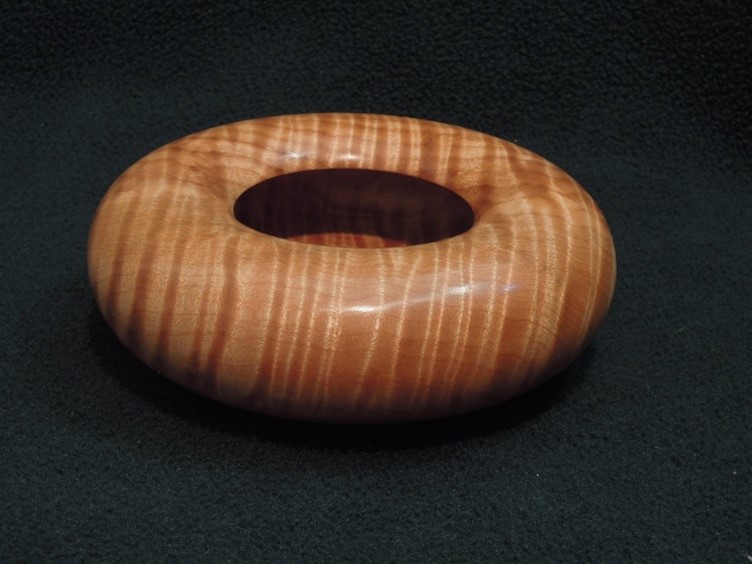
Taurus shaped tiger maple finished with Danish oil
The Beall buffing system was used on this project.

Platter made from a maple burl with copper fill near a bark inclusion
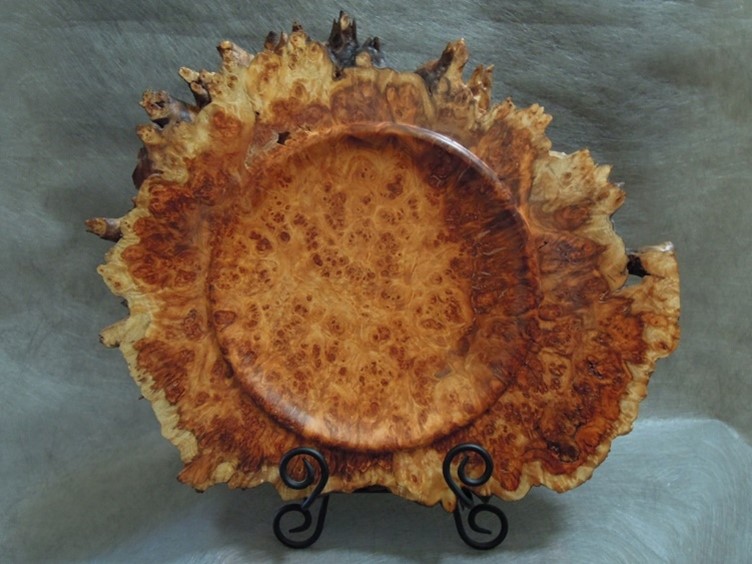
Large cottonwood burl, about 18 inches across
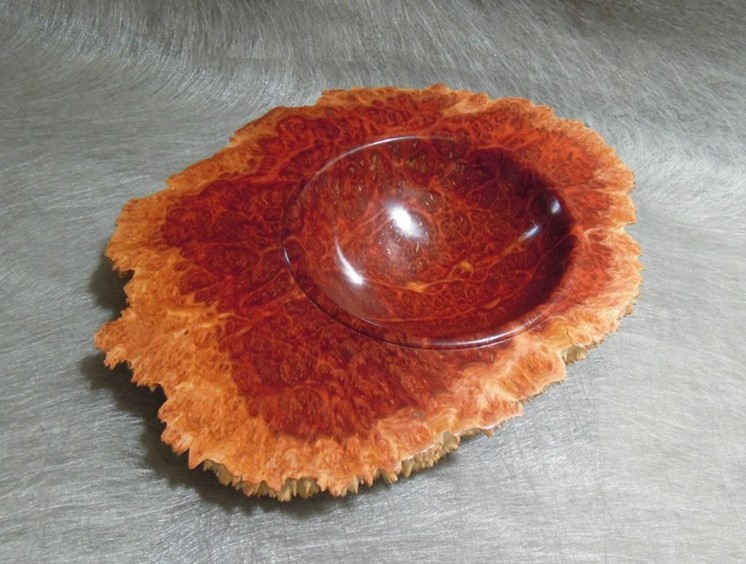
Red burl
Sanding and Finishing Tips: Turning Tips (for a smoother starting finish)
Jaw size – the larger the better: Larger jaws to fit the project will have less vibration in the wood. Many people use the 50 mm jaws for projects where a larger set of jaws would be more beneficial. Shear scraping with swept back gouge: Use fine angel hair cuts. Shear scraping with standard and negative rake scrapers: Choose the correct tool for cleaner cuts. Dealing with tear-out (water / sanding sealer / oil): First sprinkle with water to raise the grain, then coat with sanding sealer, use walnut oil then, finally, sheer cut the surface. With large platters (or thin walls), work in a few inches at a time: Leave it thick, then clean cut a section at a time.Sanding & Finishing
Embrace the process! Lung protection!! Fine sanding dust can damage the lungs. Use a dust collection system and dust masks. Sand at a slow speed!! – 200-350 rpm (lathe and power sander) Whether using hand or power sanding, you want to feel the paper catching on the wood as it sands. If you go too fast, it skips across the grains or can heat up the wood. He usually sets his lathe to 100 rpm and the drill at ~200 rpm when power sanding. Sand through all of the grits – do not skip! Spend more time at the rougher grits. Don’t move to a finer grit too soon (clean between grits): Clean between grits with a paint brush or air compressor. There are scratches that you don’t see until you move to a finer grit. Sanding creates a fine powder that goes into the scratches. It doesn’t take much pressure to force the dust into the wood. Do not hesitate to go back a grit (or two!) Use a backing pad! Many use leather, foam, a flipflop… Jerry’s finishing schedule for figured wood Sanding to 180 “Whiskering”: wet with water to bring up the fibers so you can sand off those ‘hairs’ More sanding to 240 Sanding sealer — (clean thoroughly before applying!) More sanding to 320 Sanding sealer — (clean thoroughly before applying!) More dry sanding 320/400 Walnut Oil sanding to 400/600: walnut oil acts as a sanding lubricant that soaks into the grain; fine fibers when sanding can clog the sandpaper or Abranet; clean with a toothbrush Danish Oil – 00/000 Abrasive pad as applicator: has linseed oil in it; Danish oil pops out the figures in wood. Polyurethane is a water-resistant finish that can be used after the oil has cured and gives it the shine. Drying time Buffing/polishing: If using Tripoli and it’s gummy, it’s too early to buff because the surface hasn’t cured. Oil based varnishes may be applied over Danish Oil. Other tips: Jerry’s formula for finish: 2 parts walnut oil, 1 part Minwax silver polyurethane and 3 parts thinner. To see if there are scratches at the fine grits of 320-400, leave the project on the chuck and take it out to look at it in the sunlight. If there are scratches that show up due to damage during buffing, walnut oil can be used to fill areas and then sand 400-600 grits. The quality of the wood affects the results. Jerry has some informational handouts in pdf format that members can have if they are interested. One has a few charts that identify the best sanding speeds based on the diameter of the project (sanding speed by diameter). Another is a chart that identifies the amount of denatured alcohol to mix with shellac flakes (shellac cuts). He also has an excellent chart that compares the properties of various finishes, their ease of use, drying and curing times, as well as other details (woodturning finish properties). Members can request copies of those handouts from Jerry Walters, Mark Oglesby or Kathy Allen. Meeting notes by Kathy Allen