Members showed and discussed more woodturning aids and continued the discussion from the September 8, 2021 meeting.

Bill McDonald

This jig is used for slicing segment rings in half for bracelets. The 6” X 12” backboard is set up parallel to the saw blade. A saw stop is clamped to the right-hand side. The holding board (on the left) keeps the segment from spinning. Bill slices to 1/8” then sands them on a drum sander. He slices, rotates and glues them so the segments are offset. He cuts slowly with a fine, 10 tooth ¼” blade so there are not many marks to sand off. The blade tension is as tight as a 3/8” blade would have.
This shows the first slice with a stack of slices behind the jig.
This circle jig is used for cutting waves in bracelets or bowls, similar to those demonstrated by John Beaver. Bill’s jig has three axes of adjustments: The chuck can move up or down, the radius can be lengthened or shortened along the metal support and it can be adjusted by sliding the two horizontal boards to different locations. The pivot point is a 1/16th” drill bit. This jig has many degrees of freedom for adjusting a variety of project sizes. Always set the measurement for the circle first before adjusting for the height.
This is a bottom view of the circle jig. The right- angle bracket at the top is an adjustment stop and also helps keep the jig from tilting. The yellow piece is the runner for the table slot. On the far right is an adjustable stop for the slide.

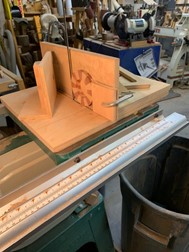
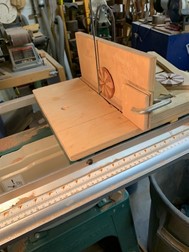
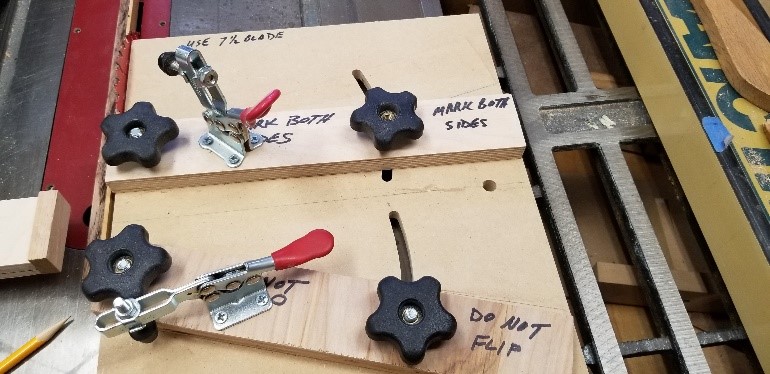
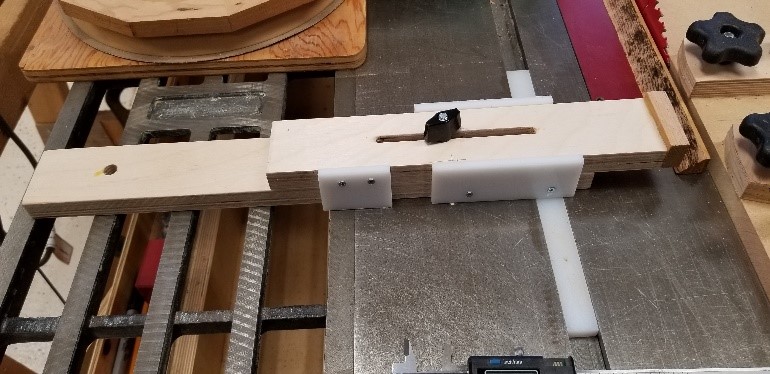
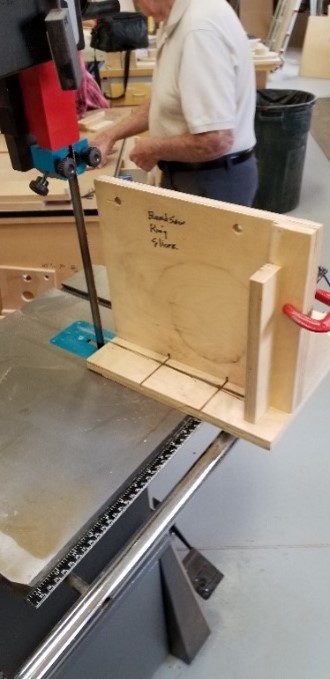
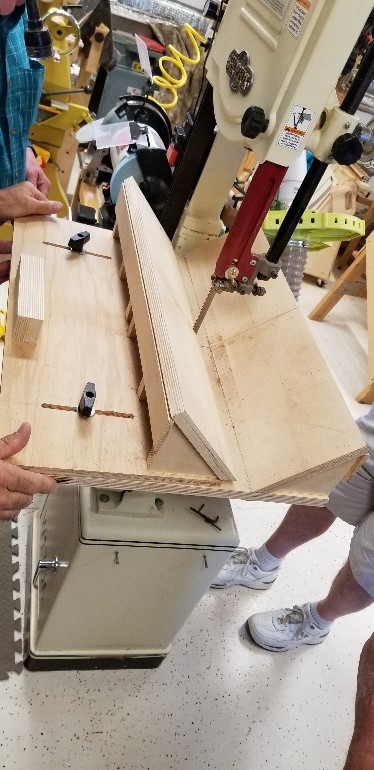
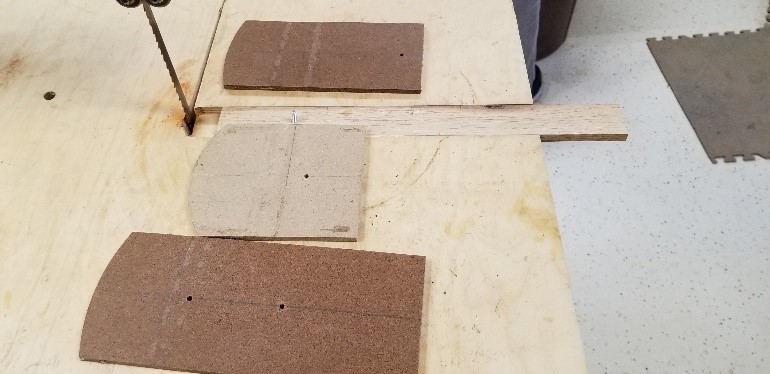
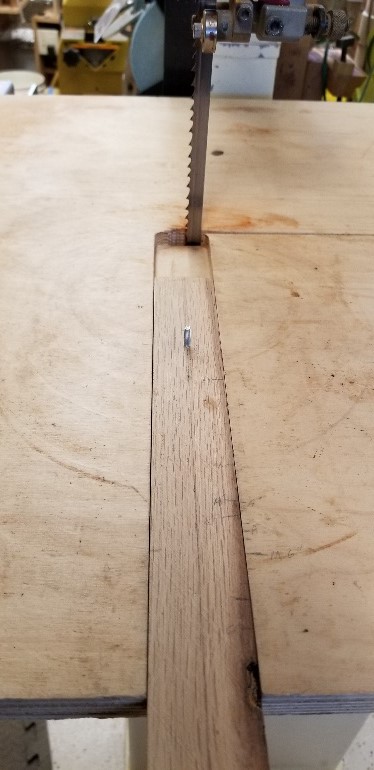
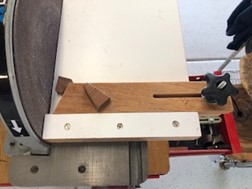
This segmented wave bowl was cut with the circle jig. A sacrificial piece was used when cutting the project.

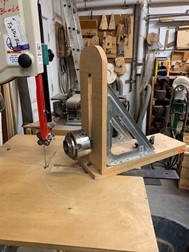
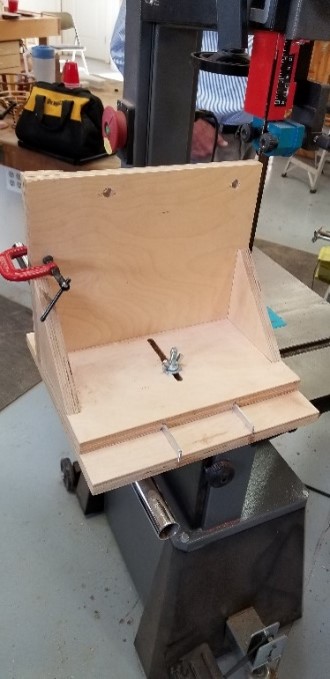
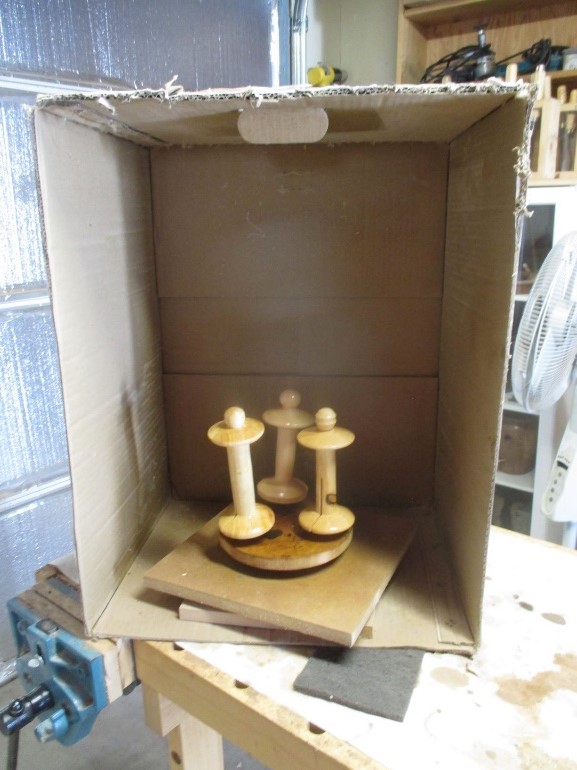
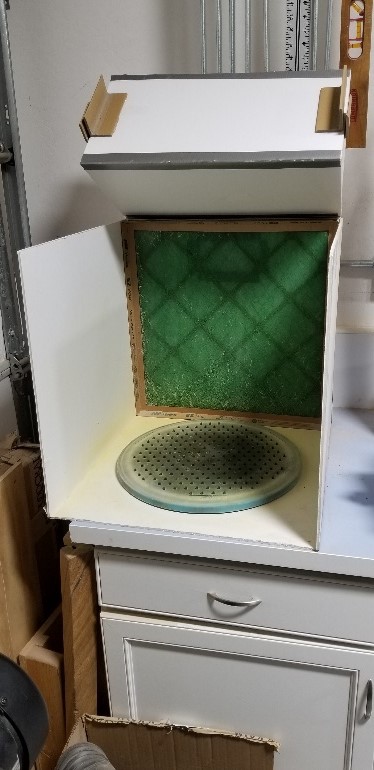
This example shows how a peppermill is held on the lathe. The two supports have been sized to fit the internal size of the opening. On the left is a piece of wood on the live center. On the right is UHMW, ultra-high molecular weight polyethylene. It’s yellowed from finish that has been used on previous projects. CA doesn’t stick to this material. UHMW is available in sheets or flat bar from Woodcraft, Rockler and Klingspor, but blocks that could be used in a chuck are available from www.interstateplastics.com.

This wedgie sled uses self-locking knobs. A 2 ½” wide piece can be pushed through it.
This saw stop is used when cutting segments for segmented projects. Use calipers between the plastic rectangles on the side to set the desired segment size.
This log splitter jig has two tracks and two knob positions that can be set to an upper or lower position to match the size of the log. It runs against the fence on the bandsaw.

Ed Jones

This is another version of a jig used on the bandsaw to slice segmented rings.
This is the other side of Ed’s segment slicing jig. He used aluminum bars between the base and the fence for alignment purposes.
This photo shows the wedgie sled and saw stop guide in use when cutting segments.

Dick Kelly

This set of wooden jaws was turned to fit on a scroll chuck. The chuck itself was not large enough to hold a ring without the expansion of the wooden jaws. It was made with countersunk holes and trued on the lathe.
The jaws allow the gouge to get closer to the item being turned, such as the ring in the photo, and avoids the metal-to-metal contact of the scroll chuck and a gouge. In this case, there is a 4 ½” opening in the ring. The wood on the jaws is sacrificial if necessary and can be re-turned or replaced. However, in most cases there’s little contact while turning.
This is an example of a Beads of Courage box that was originated by Johnny Tolly. The wood is turned from boards while the center is fabric glued over a 6” PVC pipe.

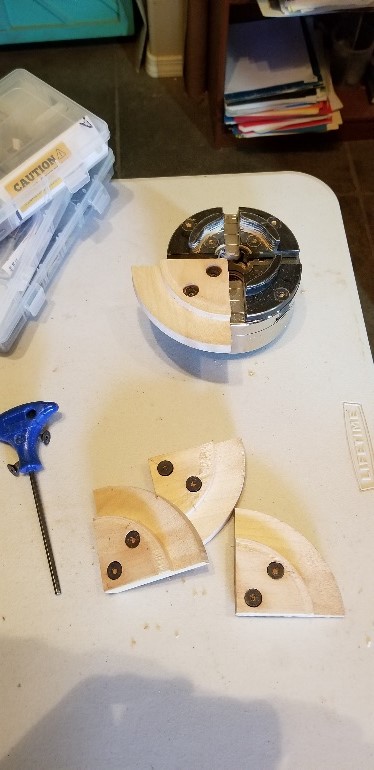
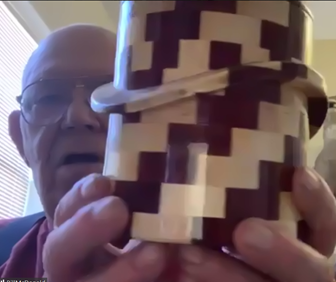
The ring that the lid sets on is turned while using the wooden jaws.

There is actually a lot of turning involved in making a Tolly box to remove wood and reduce the weight of the box.

Gary Frank

This log cutting jig allows the log to sit in the v-groove and keep it from rolling when making a perpendicular cut.
These are base plates used when making wave bowls to cut the radius. They fit over the pin in the circle jig. To understand how they are used, view Gary’s demo video on the PAW club website. The base plates can be hot glued to the cube and then a hole wouldn’t have to be made in the bowl blank. Denatured alcohol helps remove ‘cold’ hot glue.
This is another view of the log cutting jig.
This is a circle cutting jig. It has a slider to set the correct radius with a screw as the central pivot point when cutting a cube of wood to make a wave bowl.
This is a closer view of the circle jig with the saw blade and pivot point in place.

Dan Hall

A cardboard microwave box works well as a spray booth for these binding buddies. There are holes in the circular piece that have 3 plastic caps from syringes that hold up the ‘buddies’ since each has a hole in the bottom. The caps keep them from touching the bottom when being sprayed with polyurethane. Those caps also hold up bowls and other projects. There is a lazy Susan between the two square pieces for turning the project while spraying. When not using spray poly, Dan usually uses wipe-on poly or tung oil.
This tool cart was made from wood scraps. There are three shelves to told turning tools, chucks and tool rests. The turning gouges and scrapers face down on a board with rubber shelf paper which doesn’t dull the tools but lets him see the tools to identify them. The only problems are that 1) chips have to be cleaned or vacuumed out and that 2) it used to be too big but now he needs a second one.

Ken Allen

Ken made his spray booth out of sheets of poster board and some duct tape.
In the back, he cut a small opening near the top as a simple exhaust port and taped the top edge of a sheet of paper along the port on the outside to act as a flapper valve. He placed a furnace filter in front that collects and prevents much spray back from spray can finishes. He doesn’t have a fan behind it. The top lid is only sectioned because those were the pieces of poster board he had.
Since wall space was available, he made a small shelf for the accumulating tool rests.

Jay Loden

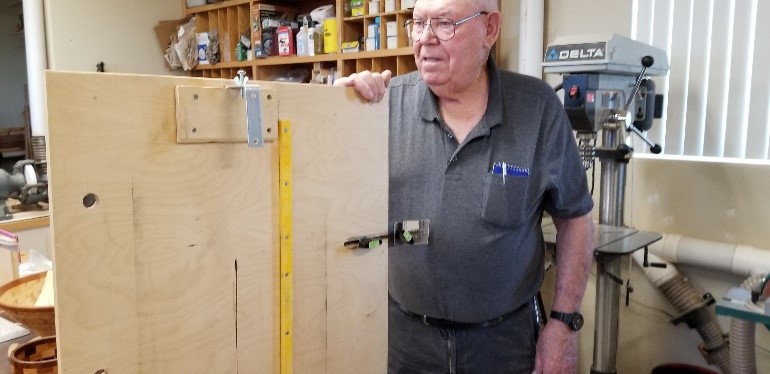
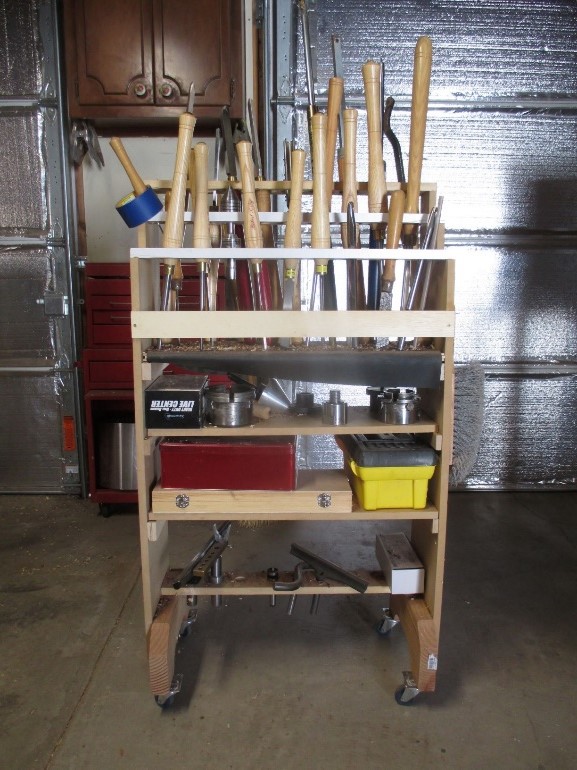
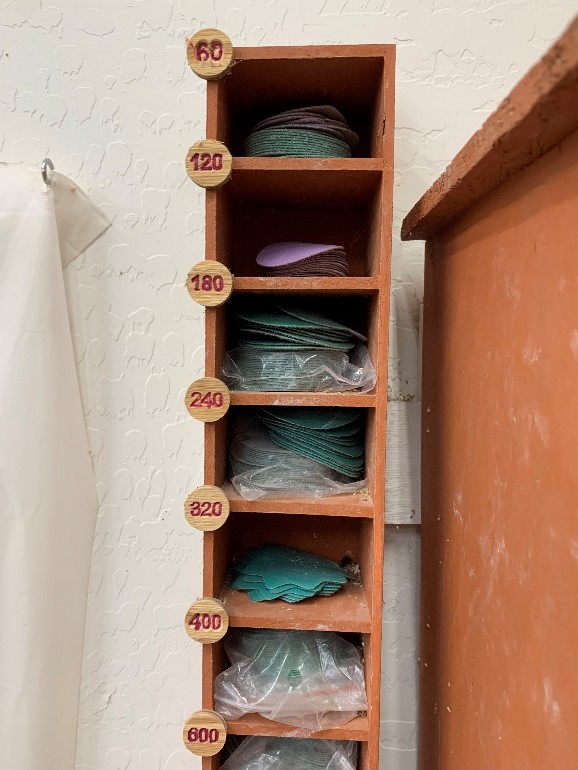
Since wall space was more available than counter space, Jay made this ‘super sophisticated’ sandpaper sorter. He buys sandpaper in bulk from Woodturners Wonders (https://woodturnerswonders.com/) and organizes them by size. He keeps a marker nearby to mark the backs if he’s using several grits during a project. The red grits are high grits with open weaves while the green grits work well with water or moisture and cut through finishes such as polyurethane. All have a Velcro backing.

The smaller shelves were constructed with 1/8” plywood.

Ray Schmelter

Ray wanted a template for calculating precise measurements for segments when designing projects. He found that Craft Supply had a photo online but no longer carried the template so he created his own and printed it on metal. Both inch and metric measurements are included since metric is more precise. This template is based on 12 segments per ring and would have to be redesigned for other combinations. However, it would be easy to use other diameters with 12 segments by following the lines and measuring the width between the lines at that point.

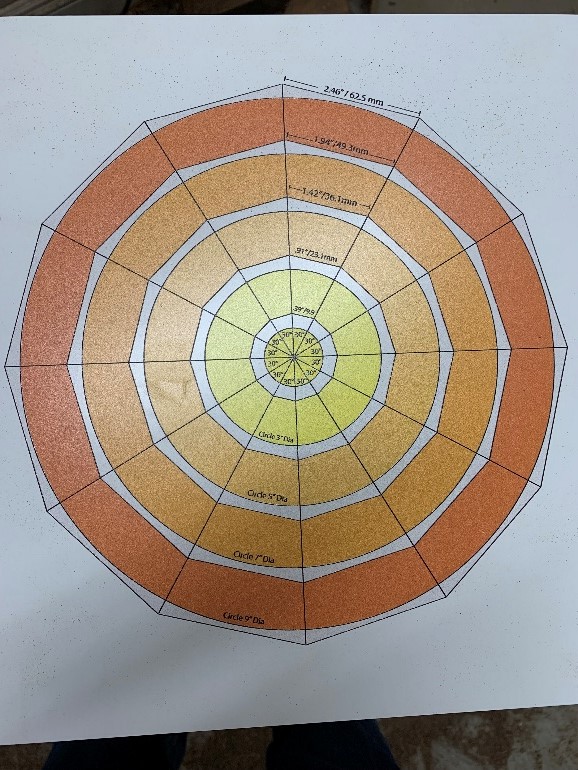
Some other sources of information on calculating segments for projects were suggested:

1. There is a free app for Android devices called Segment Calculator that gives the dimensions if you enter the inner radius, outer radius and the number of segments.

2. The Blocklayer website (https://www.blocklayer.com/woodturning-segmentseng.aspx) has a segment calculator with printable template. It is also free.

3. Segmented Project Planner is a software product created and sold by Bill Kandler. (http://www.segmentedturning.com/) It includes profiles, templates and cutting lists for projects. Although it was originally designed for a Windows platform, he gave information on using it with a Mac at this link: http://www.segmentedturning.com/XOM.htm.

The reference book, The Art of Segmented Woodturning by Malcolm Tibbetts, was recommended as a resource for learning how to put a floating base in a segmented vessel.

Ric Davis

Ric made a jig to keeps segments tight along a disc sander when sanding the edges of segments. The jig is clamped onto the sander shelf and along the fence. This allows him to cut the segments proud and sand them to the correct size.
This is a sandpaper ‘cutter’ that makes tearing sandpaper into pieces easier. He sets the sandpaper edge under the hinged piece of wood and the other side under the tape measure. Then the paper is torn along the tape measure edge.
This circle jig has a blue track with an adjustment knob for moving the pivot point screw to the correct diameter.
In another view, he found that the hole in the metal tube on the bandsaw made a good location for the jig positioning stop. The end of the positioning bolt goes into the hole and presses against a bolt head inside the tube.
This view shows the T-track with the adjusting knob below that is used to lock in the radius dimension.

The discussions today and photos from members’ shops show similarities and individual adjustments to jigs made as aids for projects. Several members have circle jigs, for example, and comparing the photos and descriptions prompted ideas for improvements and changes depending on project needs. From simple to complex, those ideas are the value in sharing these discussions as part of Chips and Grits.